FAQs
Customers
FAQ
How can customers link a new social media account to their customer account?
Customers can link their social media account (Naver, Kakao, etc.) to their original customer account by signing up with the social media account.1. Related settings
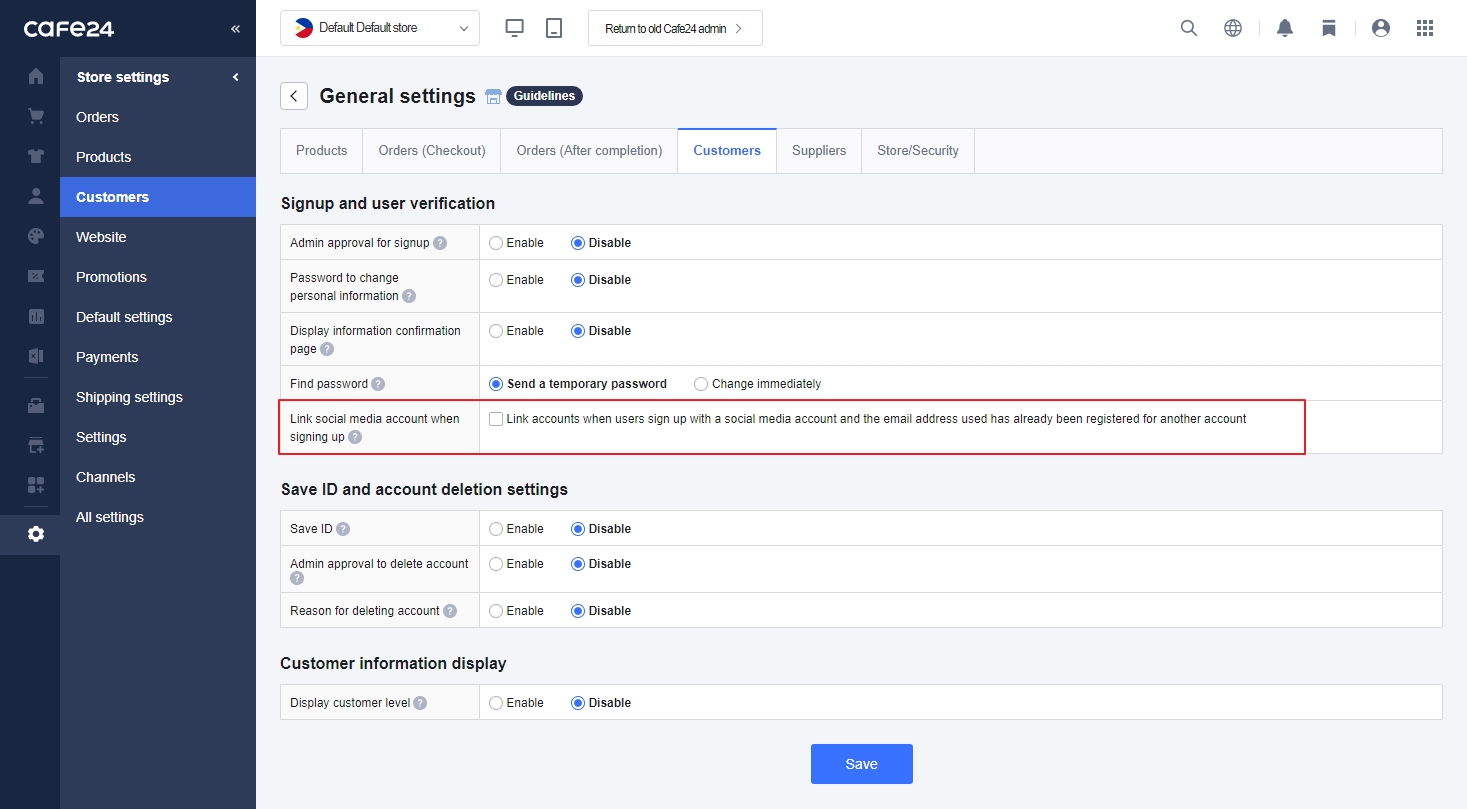
Location: My Store>Store setup>General settings>Customers>Link social media account when signing up>Check the box to enable
1) Under [Link social media account when signing up], check the box for “Link accounts when users sign up with a social media account and the email address used has already been registered for another account” to enable the feature. Once this feature is enabled, the system will check whether an account already exists with the same email address whenever a customer tries to create a new account using their social media account. If there is an account with the same email address, a new account won’t be created directly. The customer will be redirected to a page where they can link their accounts.
2) Once this happens, the customer will be given a list of the customer accounts that use the same email address. From here, they simply need to select an account and log in to link it with their social media account. Once linked, they can either log in with their original account credentials or their social media account.
※ Keep the following in mind when using this feature:
If your online store does not check for duplicate emails, customers will be able to both link their social media account or create a new account with their social media account, even when a customer account already exists with the same email address.
The previous social login link feature offered with KakaoSync has been integrated with the [Link social media account when signing up] feature.When you change the social login feature from “Disable” to “Enable,” the KakaoSync social login feature is provided under the [Link social media account when signing up] feature.
The [Create an account for your store based on information saved in LINE account]/[Sync LINE account with store account] options that were offered when signing up with a Line account will disappear. Related features are integrated with the [Link social media account when signing up] feature.
Customers can link up to 15 social media accounts to a customer account using the same email address.
As long as the email address used is identical, they can link their accounts with regular customer accounts, other customer accounts created via social login, and SSO accounts.
You can check a customer’s linked social media accounts in [CRM>Customer profile>Usage information>Synced social media accounts].
If you are using a default theme published before July 2022 or a paid theme purchased through Cafe24 Store, you will need to edit your store theme according to the guides below and add the source codes for this feature to ensure it functions properly.Read related guides
Can I stop customers from getting new account benefits multiple times?
Yes, you can stop customers from creating multiple accounts and receiving new account benefits multiple times with different settings.
You can stop customers from creating multiple customer accounts on your online store and receiving new account benefits multiple times.Follow the instructions below to stop one same person from creating multiple accounts and have them link their accounts instead.
1. Checking duplicate emails
Location: My Store>Store setup>General settings>Customer>Check duplicate emails
1) Enable the “Check duplicate emails” feature so that users cannot create a new account with an email address that has already been used.
2) Users who try to create an account with an existing email will see the following alert: This email address is already in use. Please try again with a different email address. (Notes) Certain online stores do not have this feature. If you do not have this option, your store is already checking for duplicate emails by default. (e.g., Localized stores: stores using “Email” as their signup medium.)
2. Link social media account if the email address is identical
Location: My Store>Store setup>General settings>Customers>Link social media account when signing up
1) Under [Link social media account when signing up], check the box for “Link accounts when users sign up with a social media account and the email address used has already been registered for another account” to enable the feature. Once this feature is enabled, when a user tries to create a new account on your store using their social media account and they are using the same email as one already registered, they will not be able to create a new account and will be redirected to a page where they can link their accounts instead.
2) Once linked, the social media account is linked to the original online store account. This way, customers will not be creating a new account or receiving additional benefits for it.
3) In this case, if you are also using the [Check duplicate emails] feature, customers will only be given the option to link their accounts. If you are not using the [Check duplicate emails] feature, customers will be allowed to either create a new account or link their accounts.
4) If you are using a default theme published before July 2022 or a paid theme purchased through Cafe24 Store, you will need to edit your store theme according to the guides below and add the source codes for this feature to ensure it functions properly. Read related guides
3. Use emails as a signup medium
Location: Customers>Manage customers>Signup/Deleted accounts>Account signup fields>Basic information>Email
1) Choose [Use] in the dropdown box in front of “as account verification medium” for [Email]. This will make it impossible for users to create a new account using the same email address, regardless of your [Check duplicate emails] settings.
2) Users who try to create an account with an existing email will see the following alert: This email address is already in use. Please try again with a different email address. (Notes) This feature is only available on your default store and Korean store.
4. Use phone numbers as a signup medium
Location: Customers>Manage customers>Signup/Deleted accounts>Account signup fields>Basic information>Phone
1) Choose [Use] in the dropdown box in front of “as account verification medium” for [Phone]. This will make it impossible for users to create a new account using the same phone number.
2) Users who try to create an account with an existing phone number will see the following alert: This phone number has already been registered to another account. (Notes) You must top up your SMS balance to use this feature.